Tuesday, December 20, 2011

A picture is worth a thousand words

Hi

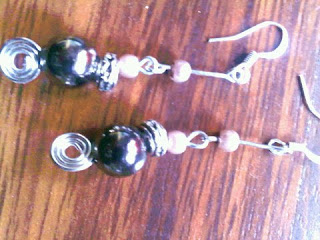
A picture definitely speaks more than a thousand words . I have been always suggested that I should edit my pic before I upload into shop.Trust me ,I never had an idea as how much the difference would make till I got my new laptop which has a basic media editor .Previous laptop did run on old version of Windows operating system ,XP I think

My new laptop had Windows vista ,which is very very good .That's when I discovered editing the pic is not only fun but also great to see the effects .

For anybody who is as naïve as me and have no idea as how to edit pics .I have just listed below a few and very basic information /steps that one can do to improve your picture quality

 1. Brightness  : Though I took pictures from a good SLR camera ,my pics were still not bright as I as expected .That's when I realised that I had to brighten them up "manually".Hence increasing the brightness is the first and foremost and very basic editing .One has to be careful to while increasing brightness ,when increased more than required the image will look like a ghost.2. Contrast : This feature or should I say property does not show changes in the picture as much increasing the brightness does.This change goes hand in hand with brightness .Hence a perfect Brightness  and Contrast ratio brings out the best of the image

3 .Color saturation /Hues : This ,according to me is a very delicate property ,when done correctly gives the image a very good look .On the other hand ,a slight increase than required can change the color of the image totally .Similar feature is Color temparature .

4. Highlights and shadows  : This feature is good enough lighten the shadows of the object in the picture .It lightens up the shadows of the object in the picture making the background much more lighter

Then there is ofcourse other features like Sharpness which makes the image much more crystal clear.Just beware that anything done more than require actually spoils the image


Hope this helps :)
Rgds

Divs

Wednesday, November 30, 2011

Monday, October 24, 2011

White glass pearl and blue crystal hoop earrings

Hi ,

These earrings have been designed differently than my usual other earrings ..Loved the combination of White pearls with deep blue crystals.

Thursday, October 20, 2011

Handmade blue birthday card

Card making can be so much fun! At the same time , to get a very idea for design can be very time consuming! And tough too!
After a long time , I was able to get this workable card design , which came out exactly as I imagined.

Sent via BlackBerry® from Vodafone

Thursday, September 29, 2011

Gorgeous handmade silver toned heart chandelier earrings

These are beautifully designed earrings ,very lightweight to wear yet very prettyI have used high quality metal pieces which are silver toned in color .Have also used dark blue crystals,along with shiny white glass pearlsThe earrings measure approximately 2cm in width and about 4cms in length

Price for these gorgeous earrings is only $8 AUD

Postage /shipping :

The earrings will be posted using the AUs Post regular servicePostage costs for within Australia : $0.65 AUDPostage to countries Australia : $3 AUDPayment methodAccept only PaypalPlease contact me at

divvisafstudio@rediffmail.com to purchase these earrings


Sent via BlackBerry® from Vodafone

Tuesday, September 27, 2011

New silver toned earrings ,wired and beaded

This uniquely designed earrings are made with black metal beads and light pink glass pearls.
The earrings are approximately 2.5 inches in length and are lightweight to wear.

I am selling this for only $5 AUD.
Postage :
For within Australia- Free!
For countries out of Australia - $3 AUD

Payment method : Paypal only

If interested , please email me at divvisafstudio@rediffmail.com

The reason for this change , that I lost my basic account with artfire and I have to become a pro member.
Unfortunately I can't afford to be one.
For time being, I am converting my blog to be my shop.
Thanks
Rgds
Divvi
Sent via BlackBerry® from Vodafone

Saturday, July 2, 2011

Luscious white glass pearl earrings

This pair of earrings is very easy to make.All we need white glass bicones 6mm, white glass pearls 8mm, and nice silver toned spacer beads, smaller 3 mm silver beads.

Take an head pin , insert beads in the following order
-small Silver spacer bead
- white glass bicone
- metal spacer bead
- white 8mm glass pearl
- metal spacer bead
- white glass bicone
- small silver spacer bead

Cut and twist the end of headpin to form the loop. Attach this loop to the ear hook. Now the earring is ready.

Change the color and beads to make customized earrings!

Simple and easy!


Sent via BlackBerry® from Vodafone

Thursday, June 30, 2011

Pictures from phone!!

Can you believe that this picture was taken from my phone?
I did try taking pics from a digital camera too, somehow the pics I took from my phone was better!
How easy can it get?


Sent via BlackBerry® from Vodafone

Sunday, June 26, 2011

New Danglers!

Newly made earrings .


I love this color combination .And along silver this pair looks just gorgeous !


Thursday, May 26, 2011

The Pink stuff !!!

Awesome creations by the artists .There is all kinds of products .. bags ,earrings ,cards ,belts ,
baskets .. you name it!

Check some out .


To see the more cool items : click here

Monday, May 9, 2011

Latest card collection

I have been trying to make cards .Here are the latest ones -


Hope I can do more !

Thursday, May 5, 2011

How to make "Hello" card

This is one of the simplest idea to make a card .All you need is :
1. Card stock (pre-cut card or card stock that is cut and folded)
2. One pattern paper with design,other darker shade pattern paper for background
3. Scissors ,glue and blings
4. Some glitter gel pens

I have used a white pre-cut card,hence my job became much easier when it came making the card itself
I have used a darker shade pattern paper for the background .This needs to be cut in the same shape of the card ,a bit smaller in measurements around 0.5 cms less on each side .
The pattern paper with design is cut in similar fashion ,smaller to background paper .

Paste the background paper first on the front of the card such that the sides sit in parallel to the card itself .Similarly paste the pattern paper on the background paper .

Stick the butterfly rhinestones and other blings to put some charm to the card.Use the gold glitter gel pens to outline the design .Use the green glitter gel pen to sketch the words "Hello" on the card.

Tuesday, May 3, 2011

Awesome Easter break!

Easter break was too good and kind of very much needed - especially for me. We had been working so continuously that we were very desperate for a small vacation.
Finally we traveled to beautiful Rye beach. It was so relaxing! We stayed at a caravan park,spent most of the time at the beach.
A splendid break!

Sunday, March 27, 2011

Curry puffs

Curry puffs Recipe
Items needed for curry - I am using potato curry here, any dry curry can be used.
1. Boiled potatoes with skin removed about 4 in number. Crush the same into small lumps
2. 1 medium onion finely chopped
3. 2 or 3 green chillies finely chopped
4. Mustard seed, cumin seeds- 1 tea spoon each
5. Channa dal(split peas dal), split black gram dal without skin- 1 tea spoon each
6. Salt as per taste
7. Pinch of turmeric
8. Oil - 2 tbsp
Method :
1. Take a sauce pan/ wok and put oil
2. Add mustard seeds. When they splutter, add cumin,Channa dal, black gram dal.Fry for few seconds
3. Add the chillies, saute for a min,then add the onions and fry till they are translucent.
4. Add salt, turmeric and mix well.
5. Add crushed boiled potatoes, and mix well. Fry for another 2 mins. Take it off from the flame and allow to cool

Making Curry puffs :
Items needed :-

1. Pastry sheets
2. Baking tray

Method :
1. Cut pastry sheet into rectangles,about 5-6 pieces from a single sheet.
2. Place some curry in 1 pastry shEet piece and seal the edges to make a pocket. Repeat the same for all the other pieces.
3. preheat the oven 200 degrees. Place all the pockets made above on a greased baking tray . Bake for about 15 - 20 mins . R
4. Remove and set aside for couple of mins. Serve with tomato sauce